
Welcome to the Lynda Kanase Design Team – Spring Things Inspiration post. Today the Team will share ways to use my Spring Things set of dies and Spring Phrases stamp set. I designed these with lots of phrases, playful flowers, leaves, insects, a bird and a label shape to give you lots of creative possibilities.
Amanda from Pear Blossom Press created this amazing interactive card with a surprise twist hidden away. She also made the flowers and leaves with an iridescent shimmer. Check out the tutorial and video to learn how she created it HERE.

Karen from Painted Mountain Cards created a beautiful shaker card using black as the perfect contrast to the brights and pastels of her Spring flowers. I love how she created the leaves out of unconventional colors that look absolutely stunning. Check out her tutorial HERE.

Daniela of The Art Life of Daniela Costa has captured a bit of Springtime in these tags. I love the colors and the gentleness in these tags. These would make a lovely addition to an Easter Basket or any gift. Visit her blog HERE to see how she created these.

Mitsyana of Up On Tippy Toes added her signature rendering technique to shade the flowers and leaves on this lovely card. She also used black which created a nice contrast to the yellow flowers. This card is just perfect for a cheerful greeting. Check out her blog HERE to see how she made this.

Pam of A Girl With Flair mixes patterns, textures and colors in a beautiful way. Her work always has an element of surprise like in the bird’s beak or the bee’s coloring. Check out all the details on her blog HERE.

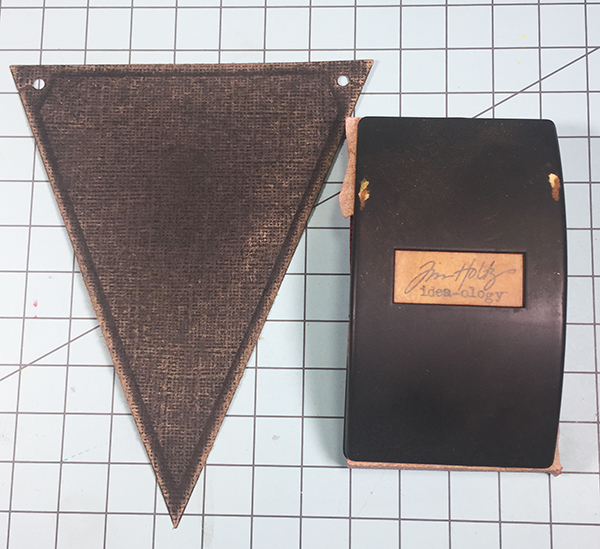
As for my project, I chose to make the flowers and leaves in bright colors against a distressed, black banner background. 
I chose several bright card stock colors and used black, Core-dinations, kraft core card stock for the banner {from my old stash}. I used my BigShot machine to die cut the banner using my Tropicool Banner die then lightly sanded the edges to create a distressed look.
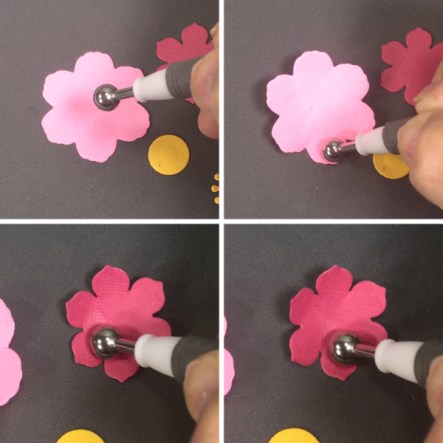
I die cut all of the flower and leaves then added some dimension to the flower pieces using the Paper Sculpting Kit tools. By rolling the round ends of the tool onto the paper, the fibers stretch and create an added dimensions.
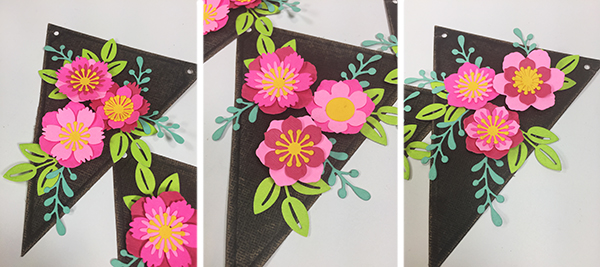
I layered all of the flowers a little differently. I adhered the leaves first then added the flowers using foam dots on one flower on each banner to add more depth.
Hope you were inspired by all of these designs. Please be sure to visit all of the Design Team’s individual blogs to see how they created these wonderful projects. Come back on the second Saturday of each month for more inspiration when my Design Team will again, share their creative talents.
Shop Lynda’s Project
Affiliate Links: By clicking on and purchasing through my links, a small portion of the sale price goes towards supporting this site at no additional cost to you. Thank you for your support.


![]()


Leave a comment