
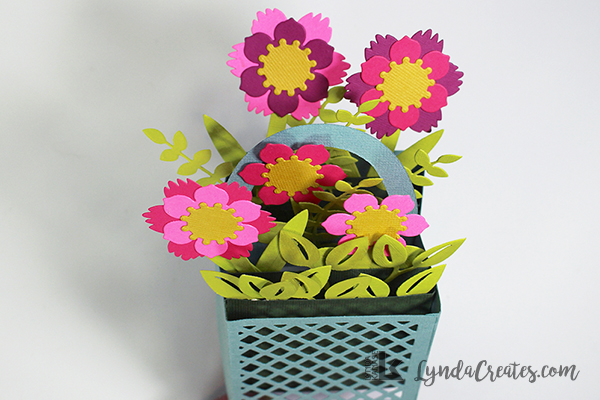
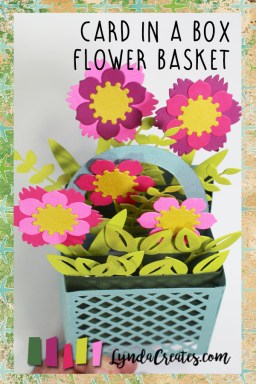
I am so excited about my new Card in a Box, Flower Basket die by Sizzix. It is a 3D card that folds flat for mailing. Here is my video tutorial showing how to make this card. This is my first time ever using Final Cut Pro so here goes!
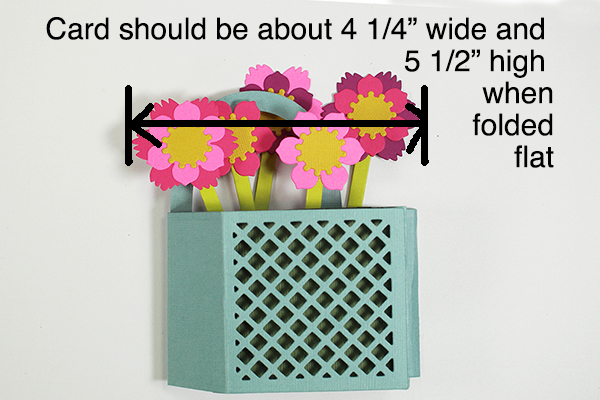
People have been asking for a tutorial on how to assemble my Card in a Box, Flower Basket die so I quickly put one together. Please note that you can add as many flowers and leaves as you like but if you want to mail this in a standard A2 envelope then make sure it will fold flat to 4 1/4″ x 5 1/2″.
Start by die cutting one of the wide, rectangle shapes.
Using the same die, place the insert piece in the large opening and die cut a second piece. These two pieces will create the basket shape.

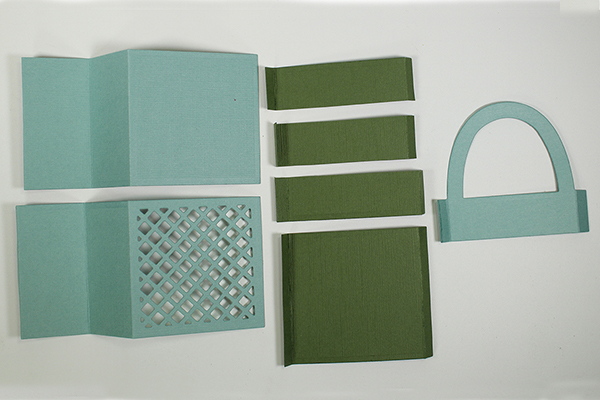
Die cut two of the square green shapes. There are two small guide lines on either side.
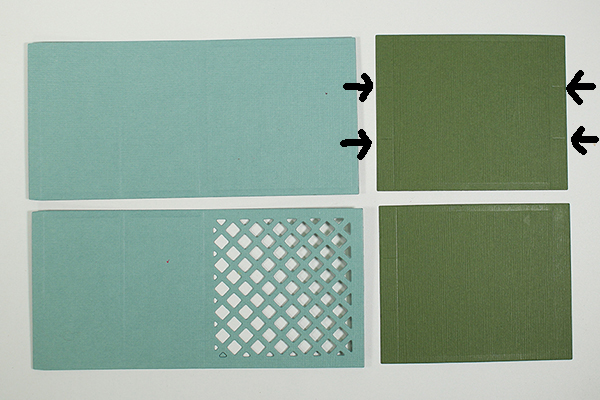
Using the guide lines, cut one of the square shapes into three strips. Die cut one looped, basket handle shape. Fold all crease lines in both directions. Arrange the pieces so that all of the left tabs fold forward on the green pieces and on the handle piece and all of the right tabs fold backwards.
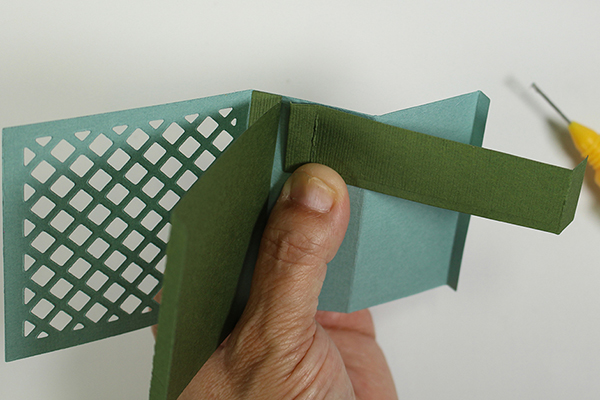
With the front of the blue basket piece facing to the left, adhere the largest green panel to the inside of the basket. The long green, forward facing tab will adhere to the side directly behind the basket front panel.
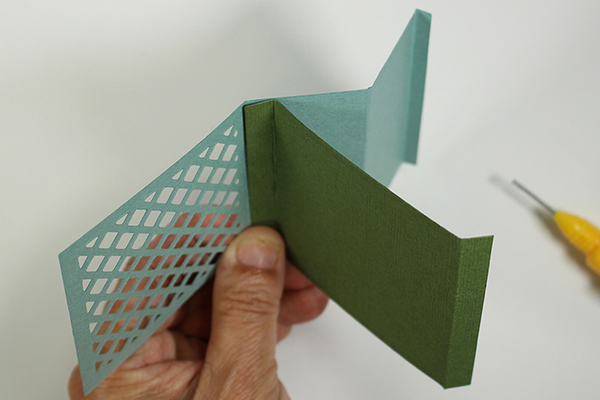
Adhere a short, green tab slightly behind the large green piece making sure the tab is folded in the same direction as the first tab.
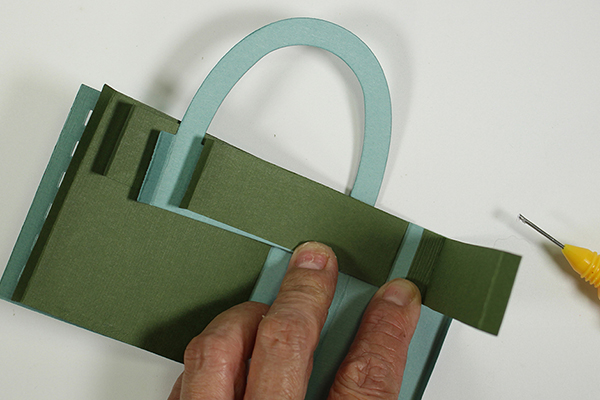
Adhere the basket handle piece slightly behind the second green tab. The basket handle should align with the center fold of the side with the tab folded in the same direction as the previous two tabs.

Adhere the remaining two short tabs behind the basket handle with tabs facing in the same direction.

Now adhere the front of the basket to the back of the basket along the long tab.

To adhere the green tabs to the opposite side, begin with the last green tab so that it is facing the back of the basket. Apply adhesive and fold the basket flat to align tab and secure the adhesive.
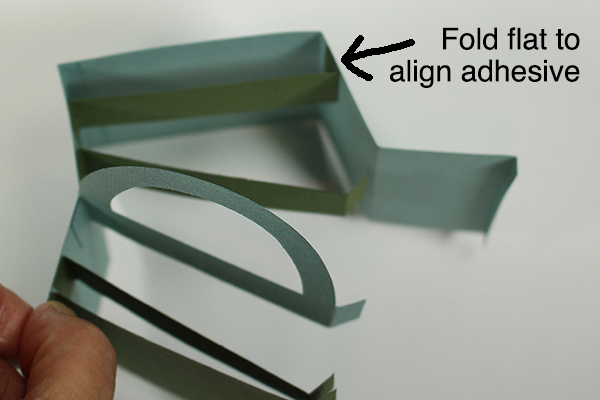
Repeat this process of applying the adhesive to the back-facing tab, then fold the basket flat to align the tab and let dry. When adhering the basket handle, align the handle to the center fold on the side and adhere the tab facing towards the back of the basket.

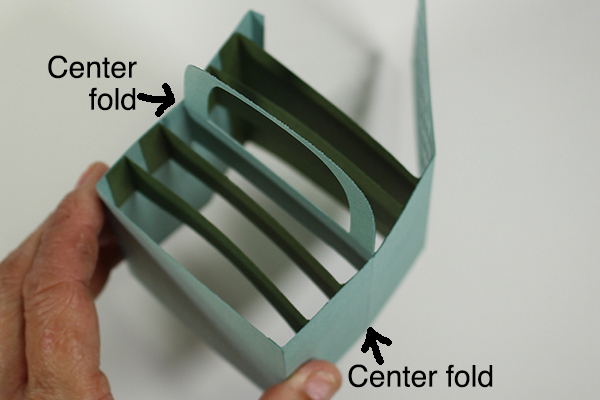
Adhere the front of the basket to the remaining long tab from the back of the basket. The completed basket should now fold flat in either direction with the center crease lines as the folding point.

Die cut as many flowers as you want. Die cut a stem for each flowers. Add as many leaves as you want.
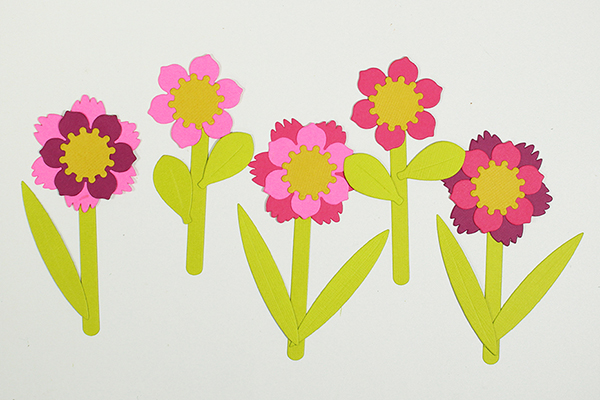
If you are planning on mailing the card in a standard A2 envelope then do not adhere the flowers much wider than the sides of the basket when folded.

The basket folds either to the left or to the right pivoting on the center fold on either side.


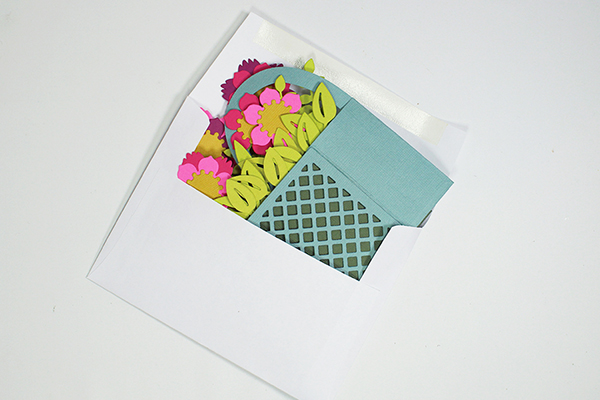
It is designed to fit inside an A2 envelope.
Hope you enjoy this. Happy crafting!
Shop This Project
Affiliate Links: By clicking on and purchasing through my links, a small portion of the sale price goes towards supporting this site at no additional cost to you. Thank you for supporting my website.


Leave a comment