
Happy Fourth of July! I wanted to share this simple project to celebrate this American holiday.

The simple red, white and blue bow is created using my Paper Clippables die set by Sizzix. I love using washi tape to create the bow because the patterns are small enough to look nice at this scale.

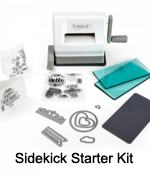
Since the bow die is small, I used my SideKick die cutting machine for most of this project.

I cut white heavyweight paper into 1 1/4″ x 6 1/2″ strips and put two rows of washi tape on each piece. This is enough to make two bows.

I die cut the bow backs from the blue striped washi tape.

Next, I die cut the bow fronts from the red dotted washi tape.

Gently curve the wide parts of the bow fronts using a die pick or other rounded tool.

I used hot glue to attach each end of the bow to the center being careful not to crease the wider outer ends of the bow.

Next, adhere the red bow to the center of the blue striped back pieces. Wrap the small blue striped band around the center to finish off the bow.

Since I had two bows, I decided to use one to make a simple tag and the other to embellish my planner.

I die cut a tag using my Seasonal Tag die and a BigShot machine. This paper is something from my stash but you can create your own fun mixed media pattern.

Die cut a small banner using the Seasonal Tag set banner piece and the word “Celebrate” from the Photo Frame, Holidays die set. Place the word die off-center so you can trim it after it is attached to the tag.

Adhere the banner and trim off the left side. Adhere the bow to finish the tag.
For my planner page, I simply adhered the bow to the end of a paper clip. You can’t get much simpler than that!

Hope you enjoy this simple Fourth of July celebration project.
Shop This Project


Affiliate Links: By clicking on and purchasing through my links, a small portion of the sale price goes towards supporting this site at no additional cost to you. Thank you for your support.


Leave a comment