
I hope people still appreciate thank you notes. It seems a bit of a lost art. I enjoy making and giving handmade thank you notes because I sincerely feel gratitude for the thoughtfulness of others.

I made a handful of these little cards and it took me longer to write the sentiment inside than it did to make a single card.

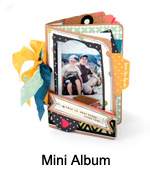
To begin, I used my Flowery Greetings set of dies, stamps and embossing folder by Sizzix that was sold at Hobby Lobby and ScrapbookingMadeSimple.com . You will also need my Mini Album die, watercolor paper cut to approximately 7″ x 5 1/2″, Distress inks in Evergreen Bough, Peeled Paint, Wild Honey and Worn Lipstick, Ink Applicators, Spritzer bottle, Stazon black permanent ink, Inkessentials Craft Sheet and a BigShot machine.

Using the applicators, rub the inks into the “valleys” side of the embossing folder. Spritz lightly with water and place the watercolor paper between the folder as shown above. You want the end of the paper to reach at least 3 1/4″ into the inked folder with the remaining white area un-inked to the left. {Please read through all of the instructions to see why this placement is important}. Since the final card will be small, you will only use the “bottom half” of the embossing folder pattern.

Run this through the BigShot machine. Remove the watercolor paper from the embossing folder and gently soak up any dark drops of ink with a piece of paper towel.

Once the ink is completely dry, place the center fold of the Mini Album die on the watercolor paper. The un-inked white area will now be the back of the card.

Fold the card. The sample on the left is how it looks once folded. I trimmed the top and bottom edges to remove the white area to create the sample on the right.

Using the banner shape from the Mini Album die set, die cut a banner from white cardstock. Next, using the “Thank You” stamp from the Flowery Greetings set, stamp on the front of the banner. I didn’t show it here but I also added a bit of Distress Ink, Worn Lipstick around the edges of the banner to add a little color.

Adhere the banner to the front of your card and share your gratitude. Hope you enjoy this simple Thank You card.
Shop This Project


This is a personal blog and all ideas and opinions are my own. I am also an employee of Ellison/Sizzix and therefore receive financial compensation not pertaining to any aspect of this blog. Occasionally I may receive material product for personal use and not for consideration to be used in my blog. This post contains affiliate links to help support my blog. You are not charged any extra cost for purchasing supplies using those affiliate links. I sincerely appreciate your support.


Leave a comment