
Welcome to the Designer Crafts Connection {DCC} September Blog Hop sponsored by Gel Press. Disclaimer: I received the Gel Press plate to create this project but all opinions are my own.
Also featured are my Mini Instant Photo embellishing dies from Sizzix available in October. These are a line of craft dies that cut frames, banners, booklets, interchangeable words and shapes that are designed to work with the FujiFilm Instax photos but can be used in so many different ways. For this project I made a Christmas Tag.

I created the red background paper using the Gel Press and Distress Paint.

I had never done a Gel Press mono print before so this was an exciting art adventure. The concept is very simple and fun.

I started with the Gel Press and my vintage roller. I’ve had that roller since I was a kid doing silkscreening. To add texture, I chose to use the Tim Holtz Burlap Texture Fade by Sizzix. I wanted something that was generic but a nice pattern. I used Distress Paint in Festive Berry and Distress Ink in Forest Moss. I know it seems self-explanatory but the Gel Press comes with two plastic sheets to protect the surface. These sheets need to be removed before using.
The Texture Fade embossing folder has a raised pattern and a lower pattern. Each pattern creates a slightly different look. It was fun to experiment. I applied a small dab of the Festive Berry paint and rolled it smoothly across the Gel Press. I added a small amount of white paint to the roller and added that separately so it wouldn’t mix completely with the red. I pressed and removed the Texture Fade onto the Gel Press to create the pattern in the paint. I laid my paper on top of the Gel Press and rubbed evenly. On some paper I experiment with different colors but I liked this example best.
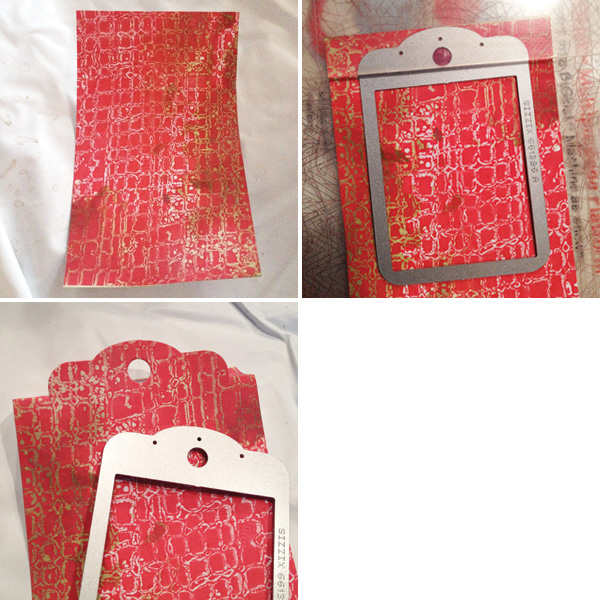
After it was dry, I applied some Forest Moss Distress Ink to my work surface, sprayed water on top and then dragged my printed paper across. This created the green color you see in the sample.
I cut the paper to 2 3/4″ x 4 1/2″ for the next step. This is where my new Sizzix Mini Photo Dies are used. The die shown is part of the Mini Album set. I used this to cut the top of my tag. In the second photo, you can see where I have positioned my top cutting pad just across the top so that the hole and decorative edge will die cut. I ran this through my BigShot machine which gave me the decorative top seen in the third image above. I trimmed off the two sides and hand-cut a rounded corner {see finished example below}.

Here are the various shapes that I used. The frame in the bottom right has an opening along the top where various words {SURPRISE} and symbol dies can be interchanged. The red banner that says Love can either cut a solid banner or different dies can be dropped inside to add words or symbols. I wanted to make these dies totally interchangeable to add plenty of decorative options. Plus many of these dies work perfectly for planner pages. And of course the frame fits a FujiFilm Instax photo.
Once I had all of the pieces cut out, I assembled my Christmas tag to show how these dies are versatile enough to use with or without a photo.
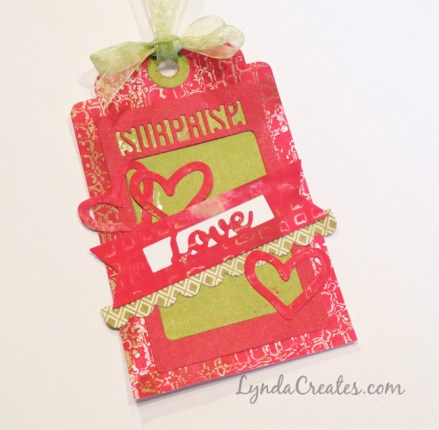
I added a little strip of white paper behind the word Love and a strip of green paper behind the word Surprise.
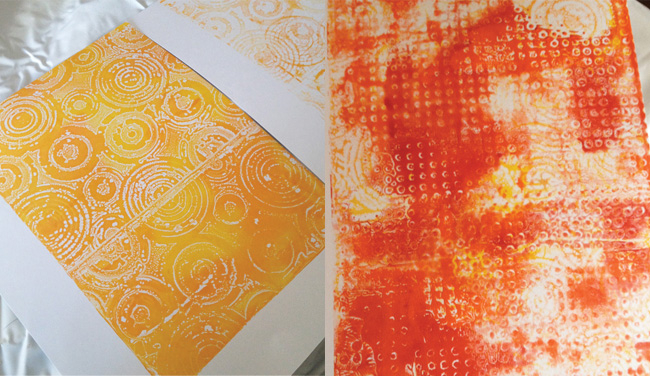
I also experimented with some Autumn colors and various Texture Fades. I love how these turned out but I don’t have a project for these yet.
I will be sharing many more ways that these dies can be used for cards, mini albums, banners, home decor or to display Instax photos at weddings or in dorm rooms.
Thank you for visiting and please be sure to continue to hop to see how all of the other DCC designers used the Gel Press for their projects.
This is Linked to:
Designer Crafts Connection
Affiliate Product Links:
661398 Photo Banner (9-Pack)

661401 Photo Frame & Words (12-Pack),
661403 Clear Stamps, Memories
661397 Paper Clippables (6-Pack)
661402 Photo Frame, Holidays (12-Pack)
661400 Photo Frame & Props (13-Pack)


Leave a comment