
Making a Hand-Stitched Japanese Rice Bag Using Japanese Fabrics – Part 1
Skill:
Easy
Category:
Sewing
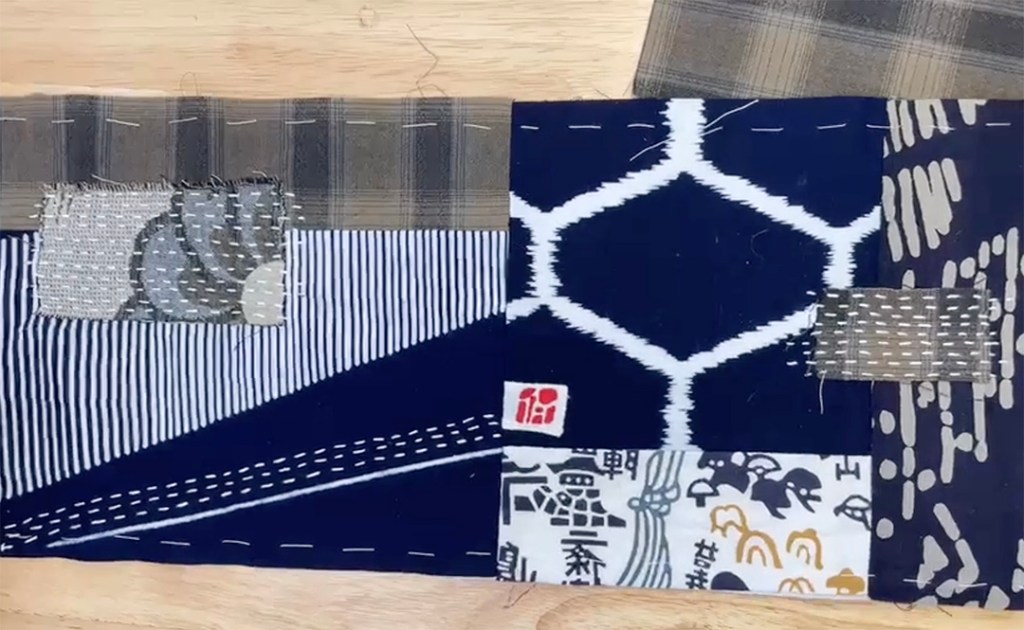
Using Thrifted Japanese Fabrics, My Mother’s Fabric and Hand-Stitching to Create My Japanese Rice Bag
Welcome to Part 1 where I guide you through the beginning steps of creating a traditional Japanese rice bag (Komebukuro), infused with personal meaning and a cultural twist using thrifted as well as an old Japanese fabric from my mother.
I’ll walk you through all of the steps to create the outside of the Rice Bag including hand-stitching all of the seams and adding Boro stitching patches.
If you already enjoy slow stitching, mixed media fabric art or Japanese culture, this project is perfect for exploring hand-sewing and Boro stitching techniques that are meditative, eco-conscious, and richly textured. Learn how to repurpose textiles, incorporate easy hand-sewn details, and add layers of story to your custom fabric creations.
This DIY textile art tutorial is ideal for fiber artists, slow stitching beginners, or anyone curious about fusing Japanese sewing traditions with modern slow craft techniques. If you love using reclaimed materials, visible mending, Boro stitching, or adding personal flair to your creative projects — you’re in the right place!
Join me next week for Part 2 where I hand-stitch and assemble the completed Rice Bag.
TOOLS
- Needles
- Scissors
MATERIALS
- Fabrics: various pieces for outside of bag – see dimensions below
- Fabric for lining: 1/4 yard
- Interfacing: Pellon Midweight Interfacing or similar – 2/3 yard
- Cotton cord 3/16″ diameter: 2 yards
- White Crochet cotton: size 8
- Thread for basting
Cut pieces as indicated below. Note that the TABS piece will be cut apart to form four finished tabs.


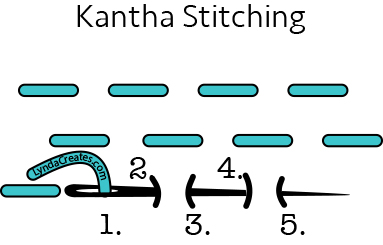
Boro Stitching or Kantha Stitching


Leave a comment