
Happy Handmade Day

Skill:
Medium
Category:
Embroidery
Stitch Your Stamps
Here’s a way to enjoy your favorite stamps while showing off your handmade talents. Simply stamp onto fabric then “color” them using embroidery floss and a few easy embroidery stitches. Think of all of the ways you can add a little flair to clothing or fabric accessories. Read on to learn the four easy stitches I used to make this handmade pouch.
TOOLS
- Wonderful World stamps by i-crafter
- Embroidery needle
- Stamping block
- Additional stamping block or book to add a hard surface behind the fabric
- Scissors
MATERIALS
- Canvas pouch
- Dye ink – we used Lawn Fawn ink in Hippo
- Embroidery floss – DMC 350, 351, 352, 353, 470, 471, 648, 794
SUPPLIES
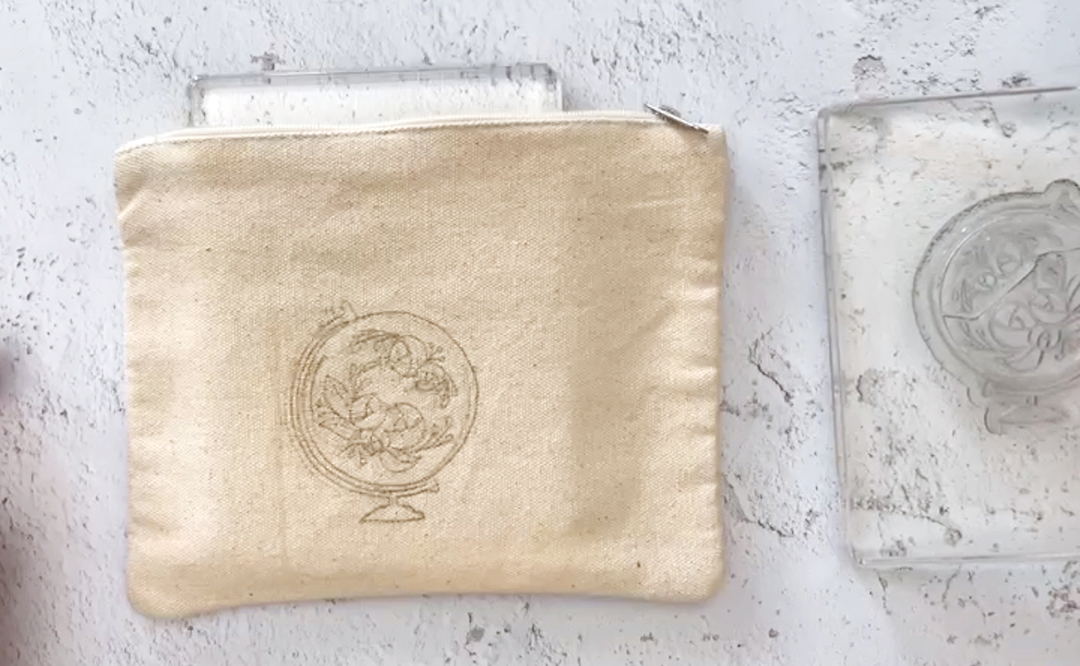
Gather your supplies. We used a small canvas zippered pouch, approximately 7 3/4″ x 6″ for our project.

STAMPING
Insert either an extra stamping block or a book inside the pouch to create a flat surface for stamping.

Using a medium/dark dye ink stamp color, stamp the image on the pouch. We chose to have the zipper on the right when open.
STITCHING
Begin with the darkest pink shade and a Satin Stitch to fill in the center of the flowers.

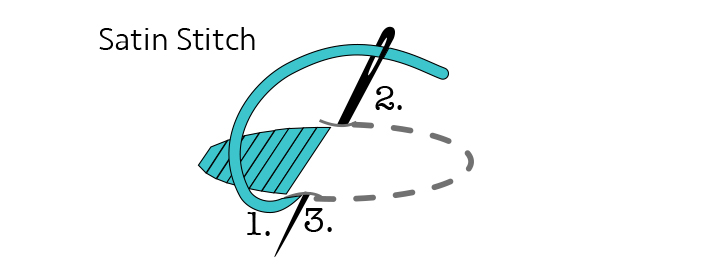
Bring it up again at 3.
Repeat to fill in the area.
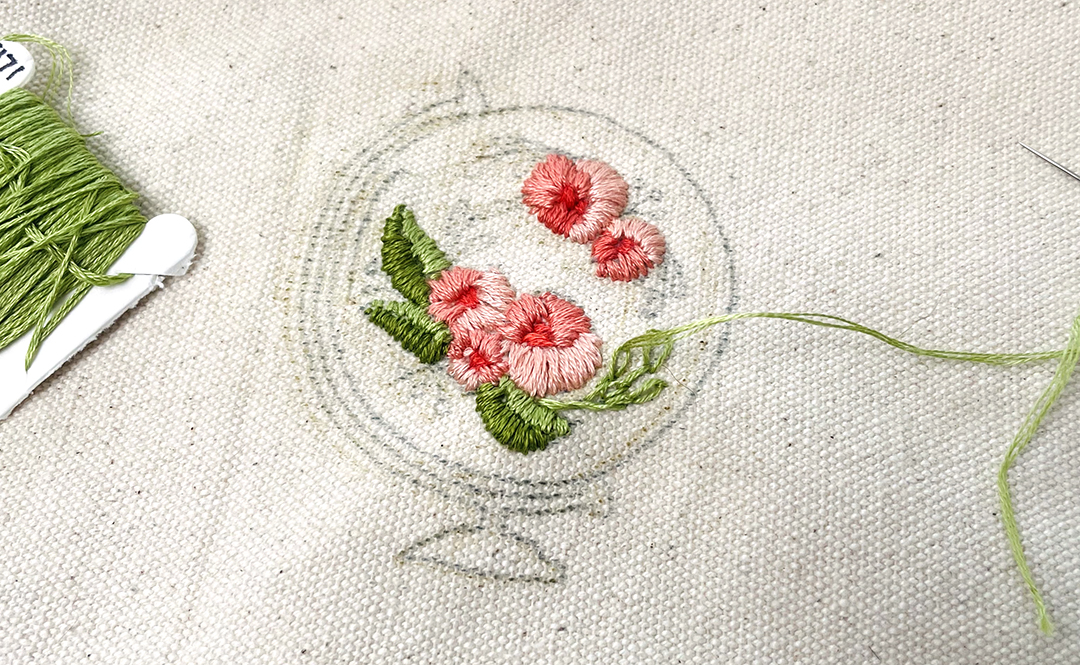
Use the lightest shade of pink and the Satin Stitch to fill in the largest areas of the flowers. Use the remaining two shades of pink to fill in the other two areas in the flowers.

Use the light green to fill in half of each leaf with the Satin Stitch. Repeat with the darker green on the remaining half of the leaves.

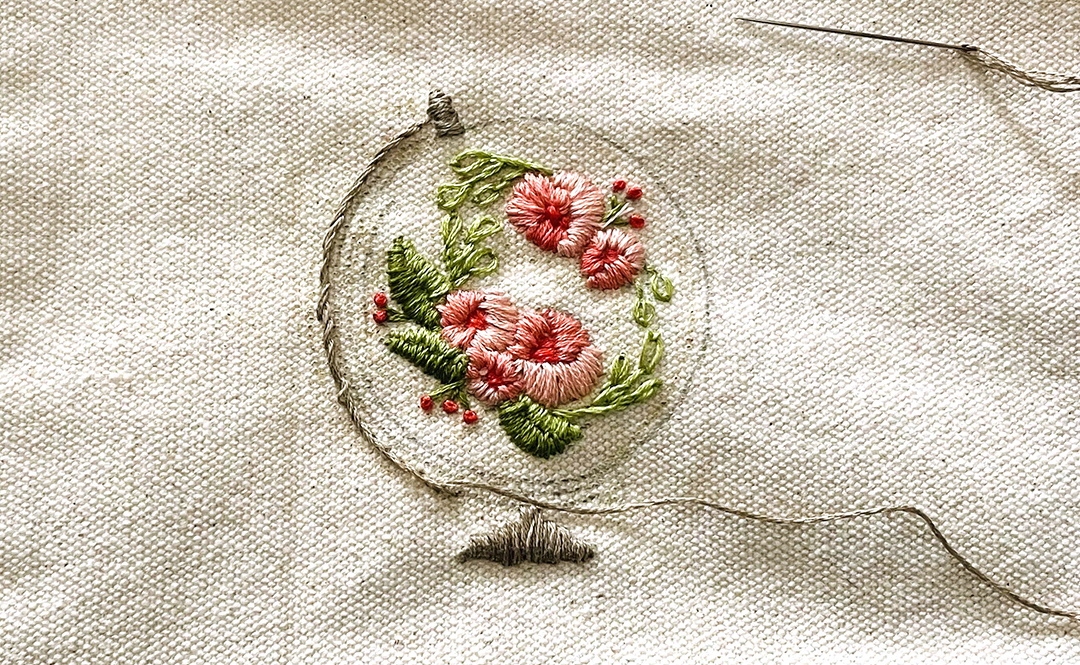
With the light green floss, use a Stem Stitch to create the longer stems and stitch a Lazy Daisy stitch on the end of each stem.

Continue by bringing the needle back up at 3 (half way between 1 and 2).
Next stitch, insert the needle at 4 and bring it back up at 2.
Repeat keeping the floss on the same side of the stitch as you work.

Bring the needle up at 2 about 1/4″ apart.
Continue by taking the needle down at 3 on the other side of the loop.
Bring the needle back up at 4.
Using the dark green floss, stitch short branches indicated by the stamped image.

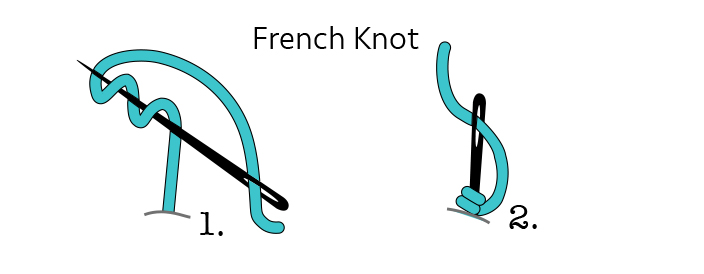
Using the darkest pink floss, stitch French Knots at the ends of the short branches.
Using the grey floss, use the Satin Stitch for the globe base and vertical pole.
Do two rows of the Stem Stitch to create the support along the globe.
Insert the needle back into the same hole, 2 until flush with the fabric.

Finish outlining the globe using the blue floss and the Stem Stitch.
Grab your favorite stamps and start stitching! Happy National Handmade Day!
#NationalHandmadeDay, #stitchyourstamps, #icrafterart,


Leave a comment