
Mixed Media Painted Tags

Skill:
Easy
Category:
Mixed Media
Painted and Ink Doodle Art Tags
Use the i-Brush Blender Brushes to apply acrylic paint onto upcycled folder tags then doodle free-form art to create unique, one-of=a=kind tags. These are brushes so they are strong enough to work with acrylic paint without damaging the bristles.
TOOLS
- Zip Gift Tag die
- Floral Garden die
- Cosmic Flare Stencil
- Fern Berries Stencil
- i-Brush Blender Brushes
- Die cutting machine
MATERIALS
- Manila folders – One folder can make up to 8 tags
- Gesso paint
- Acrylic paint in various colors – We used DecoArt Metallic Teal, Folk Art Metallic Amethyst, Folk Art Color Shift Emerald Flash, Folk Art Color Shift Green Flash and Ranger Distress Paint in Mustard See
- Cardstock in colors to coordinate with the acrylic paints (to make the tag backings
- Clear Acrylic glaze – We used Folk Art Dragonfly Glaze
- Opaque White Marker – We used Sakura Pen-touch Opaque White Marker 0.7mm Extra Fine Point
- Liquid Adhesive
- Paint palette
- Plastic bowl with lid, line with a wet paper towel
- Water spritzer bottle
- Old plastic card or scraper
Painting
Cut several manila folders in half along the fold. Place on a covered surface to protect work surface from paint. Apply gesso in a line along one side. Use an old gift card to drag the gesso across the manila folder to create a smooth surface.

Repeat on as many of the manila folders as needed. Dry completely.
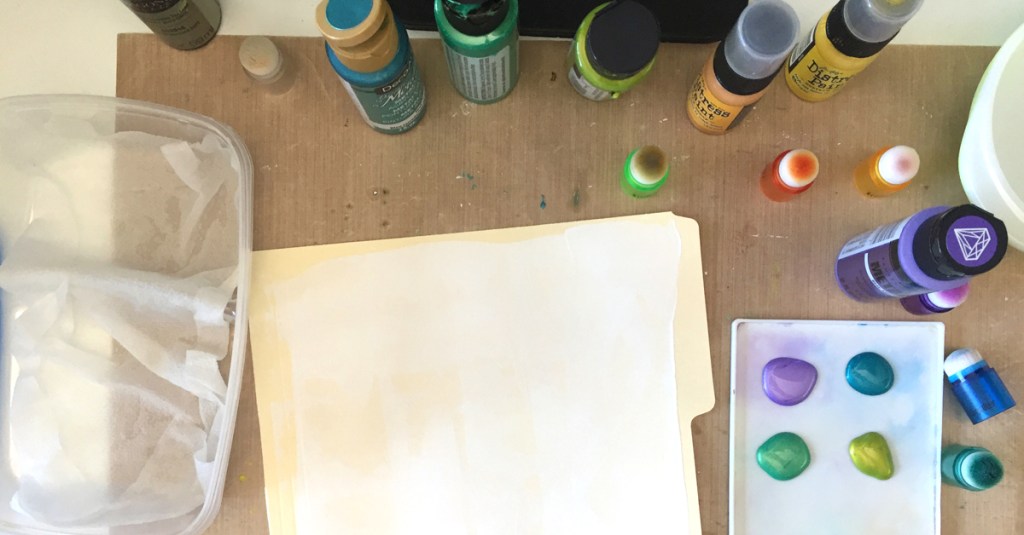
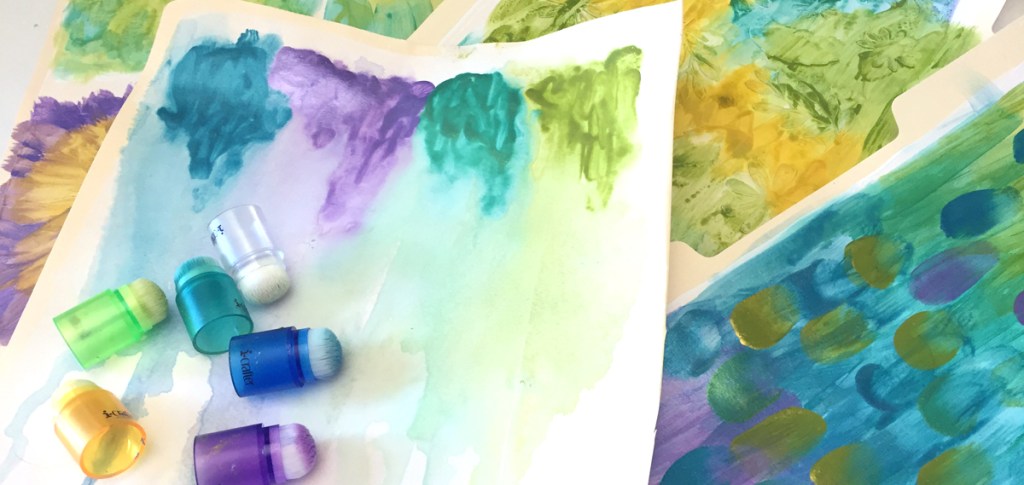
Gather your acrylic paints, i-Brush Blender Brushes, paint palette and a plastic bowl lined with a wet paper towel. The i-Brush Blender Brushes are more durable to handle painting with acrylic paints. Make sure that the acrylic paint does not dry on your i-Brush Blender Brushes by placing them in a plastic bowl on a wet paper towel between applications. When finished, be sure to wash your i-Brush Blender Brushes well.
If you are going to stop for an extended amount of time, wash your i-Brushes and lay flat to dry.
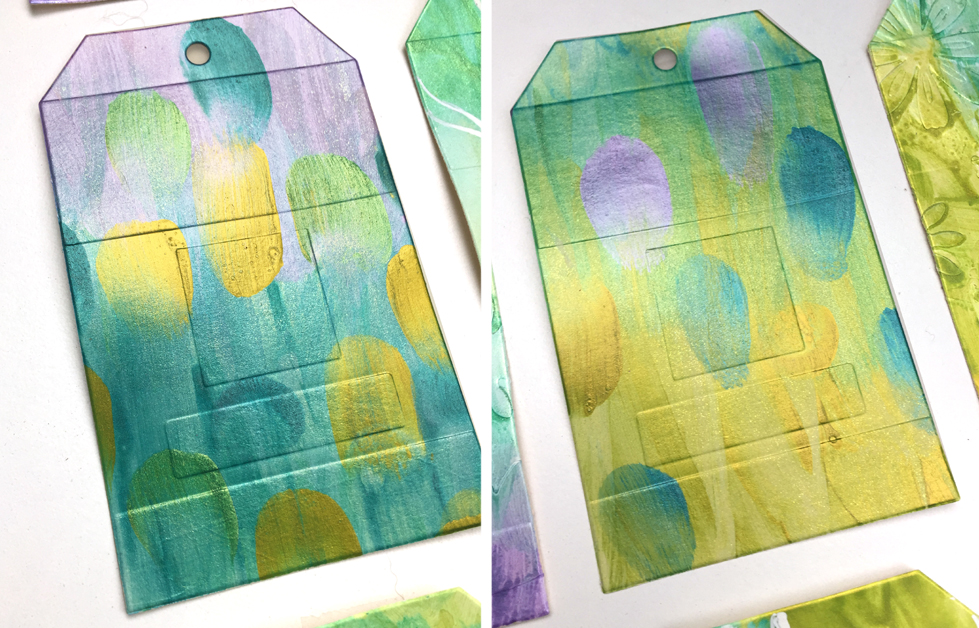
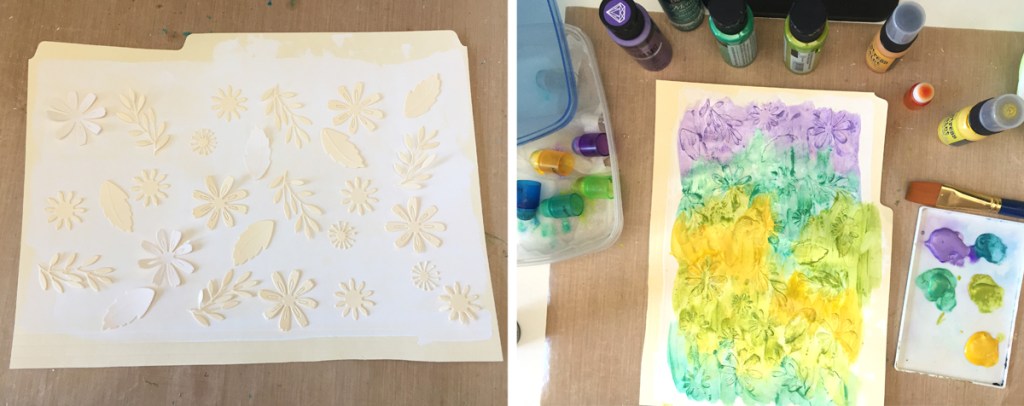
Blended Dot Technique
Begin applying short strokes of one color of acrylic paint along the top of a gesso base using an i-Brush Blender Brush. Working quickly, blend in the next color. Apply clear glaze to help blend colors. Continue blending additional colors until the entire front of the gesso base {manila sheet coated with gesso} is covered. Apply random short brush strokes across the background. Set aside to dry completely.


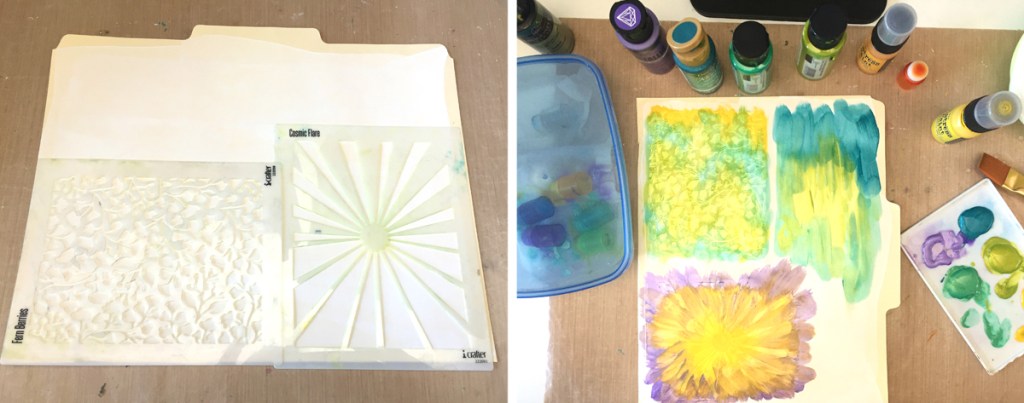
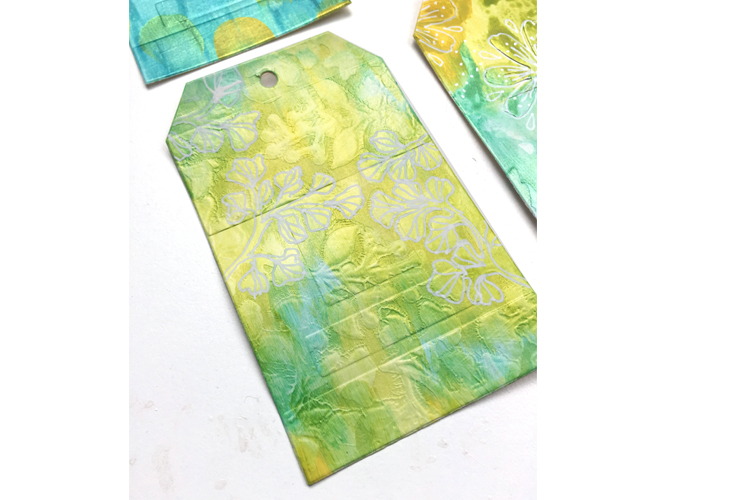
Stencil Technique
Begin by placing stencils on the gesso base. Using the old gift card again, apply another layer of gesso through the stencils to create a raised pattern. Remove the stencils and wash immediately. Set aside the gesso base to dry completely. After the gesso base is dried, apply acrylic paint, randomly blending colors or follow the stencil pattern.
Die Cut Texture Technique
Die cut various flowers from another gesso base using the Floral Garden die set. Randomly adhere them onto a gesso base. Once dry, apply acrylic paint allowing paint to pool around the raised shapes as colors are blended.


Water Blend Technique
Using a spritzer, apply a generous amount of water to a gesso base. Use the i-Brush Blender Brush to apply paint to the one edge. Tilt the gesso base and spritz with more water allowing the paint to run and bleed together. Continue to add paint and water until the colors flow nicely.

Die Cutting
Once all of the painted bases are completely dry, trim to fit into a die cutting machine. For the front of the tags, use the Zip Gift Tag die without the zip insert.

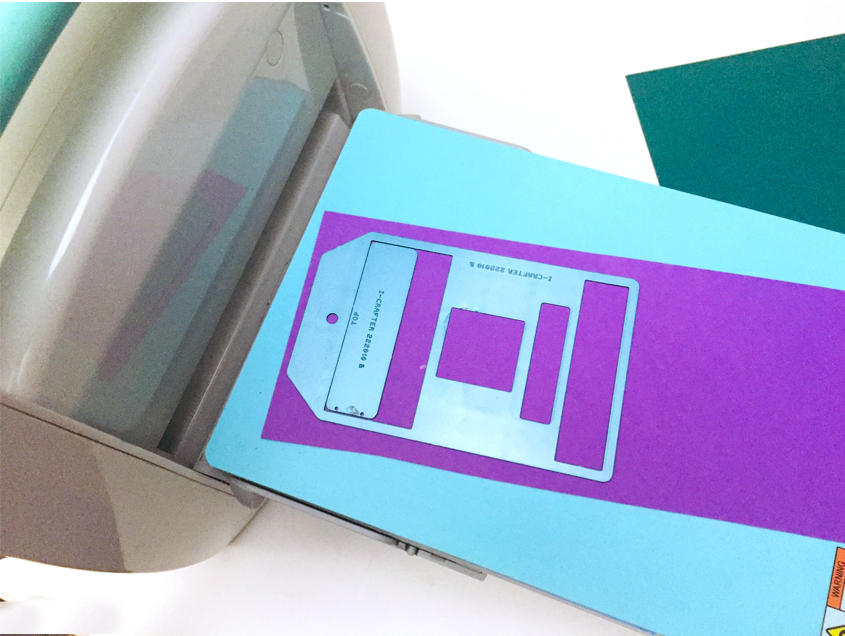
Die cut the Zip Gift Tags, with the zipper insert, from solid cardstock. Note that the zipper insert piece has the word “TOP” on the back of the die. Align the TOP closest to the top of the tag when die cutting. We suggest using the i-Mend MAGNETIC PRO Deck to make die cutting easier. The zipper insert will remain in place so there is no need for additional tape to hold it in place. Die cut enough Zip Gift Tag backings to match all of the tag fronts.
Assembling the Tags
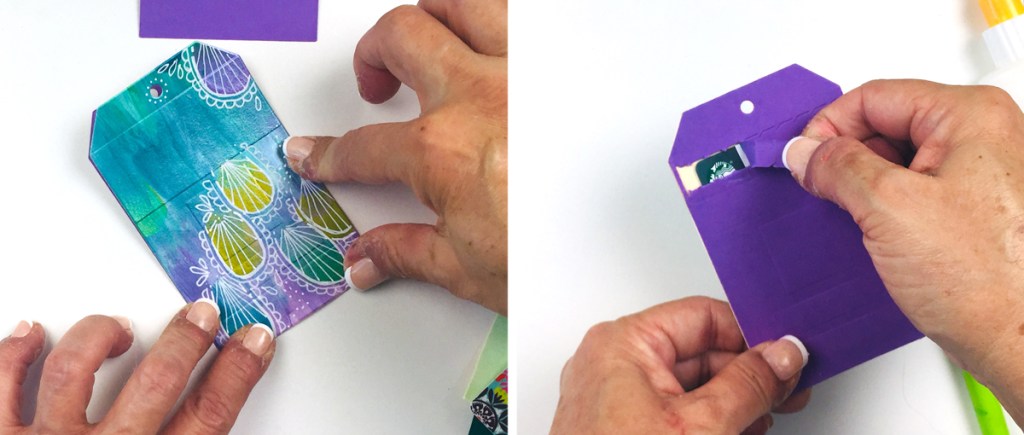
For each completed Zip Gift Tag, you will need the painted front, a die cut zipper back and a gift card if you are including it as a gift. Apply a thin bead of liquid adhesive around the edges of the Zip Gift Tag back piece. Do not apply adhesive on the zipper area. Place the gift card on the zipped tag being careful to avoid touching the adhesive.

Layer the tag front onto the back carefully sandwiching the gift card between the two tag shapes. Press the edges together to securely close the Zip Gift Tag. For the recipient: To open, gently pull open the zipped closure on the back of the tag.
Completed tags
Each tag is unique and can be embellished further if desired.
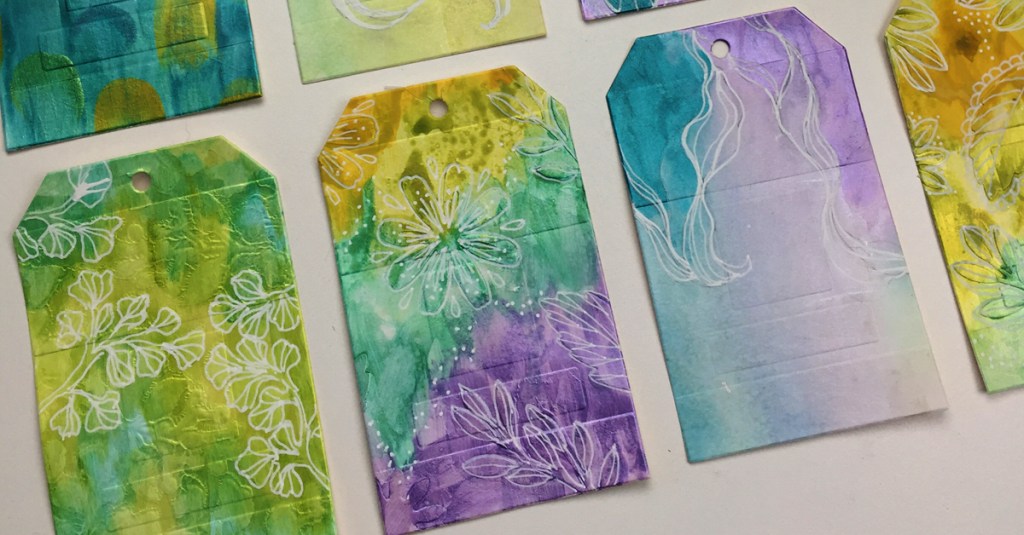
The i-Brush Blender Brushes are strong enough to handle all of these techniques using acrylic paint. These Zip Gift Tags can be created using paint and collage techniques, just painting, doodling, stamping or whatever you feel comfortable trying. This project is designed to help you experiment with different techniques. The possibilities are endless! They make a perfect base to start so many creative projects.
I hope you enjoyed these multi media / doodling Zip Gift Tag projects. Happy crafting!


Leave a comment