
At Creativation this year, I met up with some friends from the DCC {Designer Crafts Connection} group that I used to blog hop with. It was great seeing them and I realized that I hadn’t created a project with them for some time. It was time to get hopping again.
This month’s project supplies were donated by Plaid, the maker of Mod Podge. The company supplied their new matte Mod Podge Ultra Spray, a Brush Basin to clean your brushes, a 10-pack of FolkArt brushes, and a bottle of Brush Plus brush cleaner. The brushes have a great variety of sizes and the brush basin supports your brushes so the bristle do not become bent while drying. But my favorite item was the Mod Podge Ultra Spray. This is a pump spray so less mess and no visible brush strokes.

I have had this idea for a paper maché balloon egg project on my To-Do list for years. When my son was little, I made giant paper maché dinosaur eggs filled with party favors for his birthday. This was in the days before Pinterest and Instagram so I don’t have photos to share but it was a lot of fun. I wanted to recreate this idea for some giant Easter eggs.
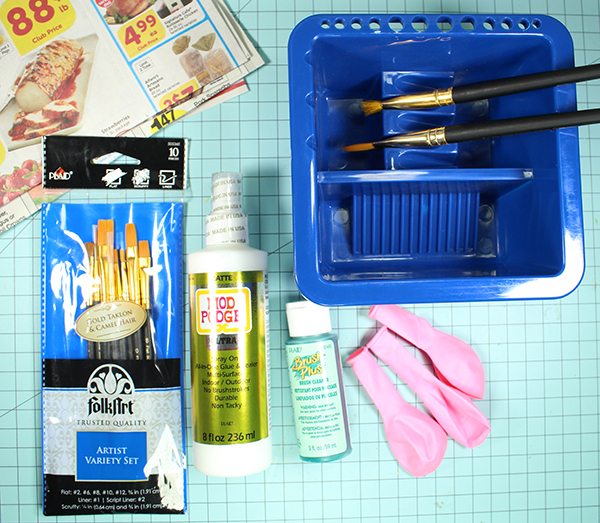
Supplies I used: Spray on Mod Podge, FolkArt brushes, Brush Plus cleaner, Brush Basin, white acrylic paint, balloons, newsprint and colorful tissue paper.
Start by cutting the newsprint {recycled of course} into approximately 1 inch strips by 3 inches long. Start with one balloon at a time. Image 1: Spray on Mod Podge and apply at least four layers of newsprint on the balloon. It is important to clean the spray top after each use to keep it working properly. The paper maché egg will take about 24 hours or more to dry. I painted a little bit of white acrylic paint to hide some of the dark newsprint before moving on to the next step.

Image 2: Cut white tissue paper into 1 inch strips and apply about four layers using the Mod Podge until the newsprint is not longer visible. Let dry for at least 24 hours.
Image 3: Using a craft knife, carefully cut a “crack” around the entire egg. This will make it easier to open the egg later.
Image 4: Open the egg and remove the balloon bits. Paint inside with white acrylic paint and let dry completely. Once dry, fill with Easter treats and candy in a sealed bag.
Image 5: Cover the “crack” with one layer of white tissue paper.
Now comes the fun part, cut colorful tissue paper into 1 inch strips and apply using the Mod Podge Ultra Spray. I created layers of colors but you can create spots or other fun patterns. I was impressed on how the spray-on Mod Podge created such a great smooth finish.
Check out all of the creative projects by members of the Designer Crafts Connection.


Leave a comment