
Welcome to a Designer Crafts Connection blog hop sponsored by Chibitronics. First I want to say that I received a Chibitronics Starter Kit to create this project and write a review. Second I want to say that I know absolutely nothing about electronics and yet I had a lot of fun with this project. My son can rewire an entire car. My Dear Handyman can rewire an entire house. I can now say that I can play with copper wire tape and little LED lights and rewire a paper arrow.

I started off by reading the easy instructions which explained how electrical circuits work. Everything seemed logical but I still made a mistake on my first attempt at creating this. After a few trials and errors I not only made this work but I also created a free Printable pattern or free SVG file to help you make this project using the Chibitronic starter kit.
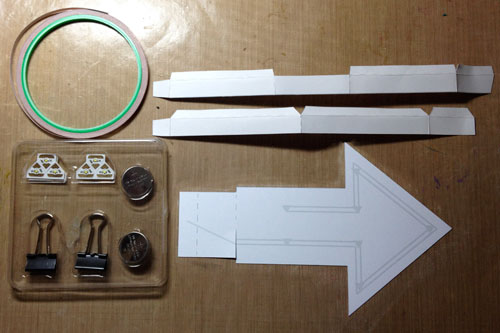
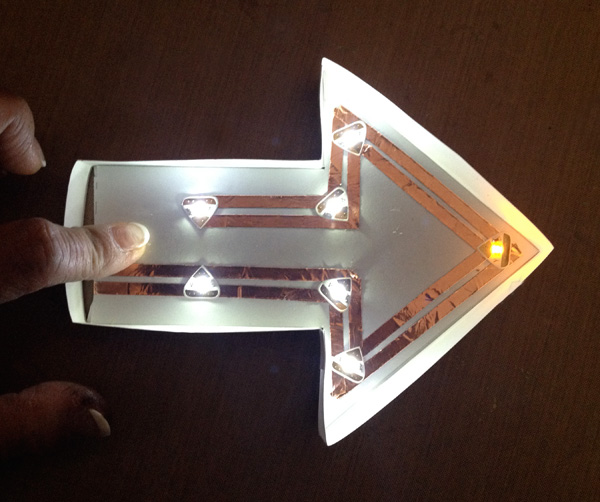
Above are the supplies needed. Shown on the left is everything in the Chibitronics starter kit, batteries, copper tape and LED lights. The clips are for holding the battery in place but I didn’t use them. Shown on the right is my pattern that I have included as a download below. The arrow has lines indicating where the copper tape is placed.
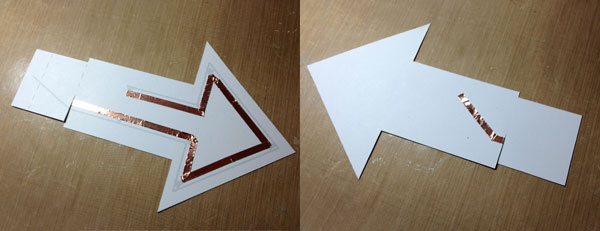
Start by placing the first strip of tape following the inner grey line which is the Negative conductor. The image on the right shows how the tape wraps around to the back of the arrow and the negative side of the battery will touch this.
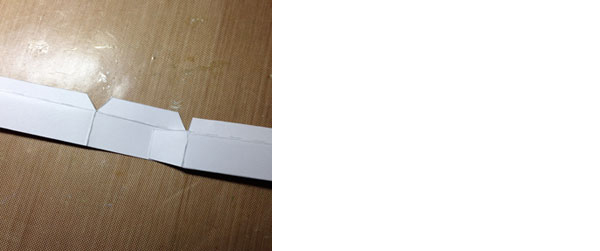
My pattern has two narrow strips with tabs that create the raised edges around the marquee arrow. Glue the two strips together using the short end tabs.
Shown on the left, above, is the second strip of copper tape. Make sure that the two tapes do not touch. Note that the second tape, the positive conductor, continues at an angle along the extended “tail” of the arrow to the left. Next, attach the LED lights so that the positive sides all touch the positive tape and all negative sides touch the negative tape. Make sure to read the Chibitronic instructions before doing any of this. Next, glue the paper edges around the arrow by first gluing the long tabs to the back of the arrow. Start at the arrow point and work your way around. The tail of the arrow should fold to the back and the edge piece does not attach to the tail section.
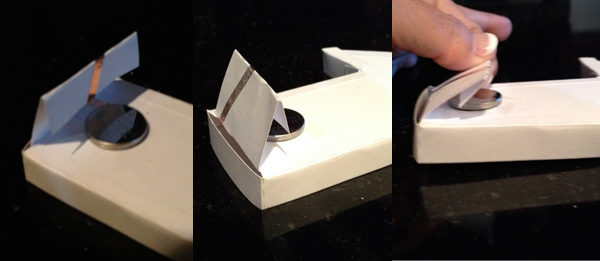
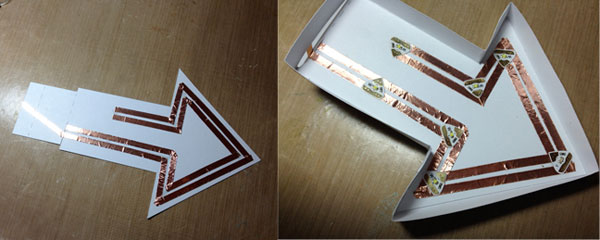
Fold the tail back on each dotted line. I glued the battery to the negative copper tape and then double-folded the tail so that the positive tape will make contact.
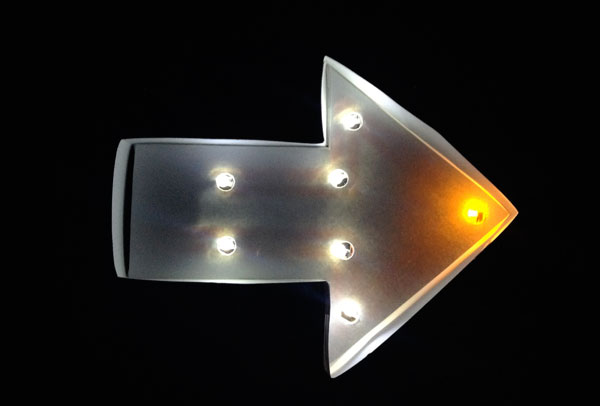
Here’s what it should look like when you have the two tapes make contact with the battery. This kit had only six white lights so the point light is yellow.
Once I was done being thrilled that I actually made this work, I decided that I wanted a more finished look. On the pattern I included below, you will find a second arrow shape. Once you have all of your lights working, place the second arrow on top and gently mark where the lights are. Remove this second arrow and punch holes where the lights are marked. Replace the second arrow on top of the lights and you have your finished Arrow Marquee.
Below is a link to download the Free Printable Pattern to make your own Arrow Marquee. Print this out on a piece of lightweight cardstock and trim. And again, I strongly suggest you read the simple instructions included with the Chibitronics Starter Kit just so you have a successful first attempt at making this project.
Enter to win your own Chibi Lights Kit by leaving me a comment and then visiting the Designer Crafts Connection blog and leaving a comment.
PRODUCT LIST
Chibitronics Chibi Lights Circuit Stickers Starter Kit

This is Linked to: A Delightsome Life, Adventures of Mel, Artsy Fartsy Mama, Chic on a Shoestring, Craft Dictator, Create with Joy, Dear Creatives, DIY Crush, Giggles Galore, Katherines Corner, Lamberts Lately, Life on Lakeshore Drive, Mid Michigan Mom, My Suburban Kitchen, Posed Perfection, Scrapality, Summer Scraps, Tatertots and Jello, The 36th Avenue, The Answer is Chocolate, The Girl Creative, The Happy Housie, The Melrose Family, Too Much Time on My Hands, USS Crafty and Wondermom Wannabe


Leave a comment