
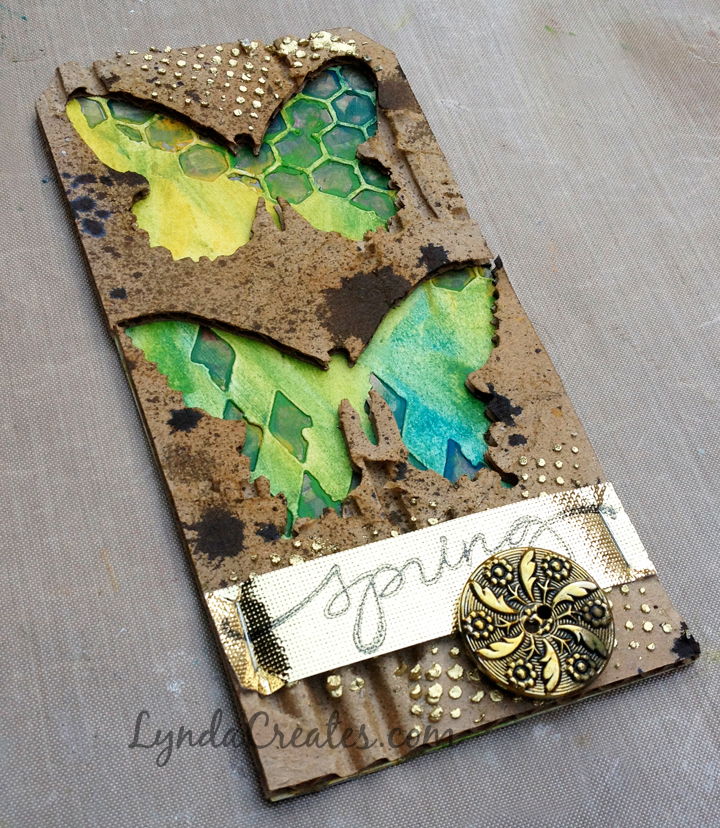
Today is the first day of Spring here in the Northern Hemisphere. Spring is my favorite season as the days get longer and warmer. So it was exciting to work on the Tim Holtz 12 Tags of 2016 to celebrate the season and use bright colors found in the new Distress Crayons – Set #1. Love the colors!
My goal in doing the 12 Tags of 2016 is to see what I can create with resources that I have available. The only supply I purchased was the Distress Crayons. They are different than anything else I’ve used before. Soft, waxy, blendable {using fingers}, translucent if you rub the color off, opaque if you leave a blob, the packaging says that it is water soluble but I haven’t tried that yet and they are just fun like finger painting.
So let’s get started on my crafting adventure of this month’s 12 Tags of 2016. Luckily it all went smoothly if a little messy. The most complicated part was trying to find the right piece of corrugated cardboard and peeling it. My first piece had thin ridges so it didn’t look grungy. I finally found a thicker corrugated box and peeled into that. I die cut the butterflies using the Sizzix Butterfly Duo die while trying to position the torn areas so they appeared nicely.

I didn’t have a brown Distress Stain so I had to make do with my old bottle of Adirondack Color Wash Dye Spray, Espresso. It worked well to spritz the color. The reason I show my messy fingers in this image is because I had just gotten a manicure the night before and had to laugh at how inky my fingers became.
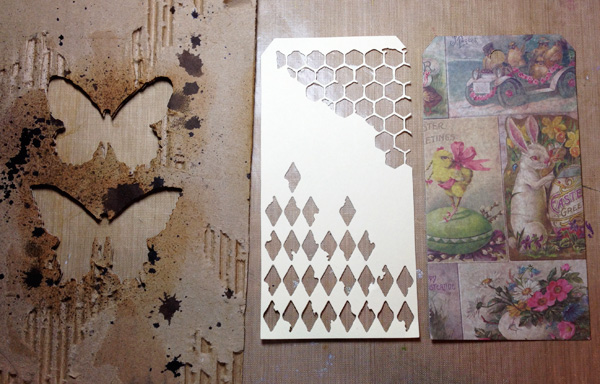
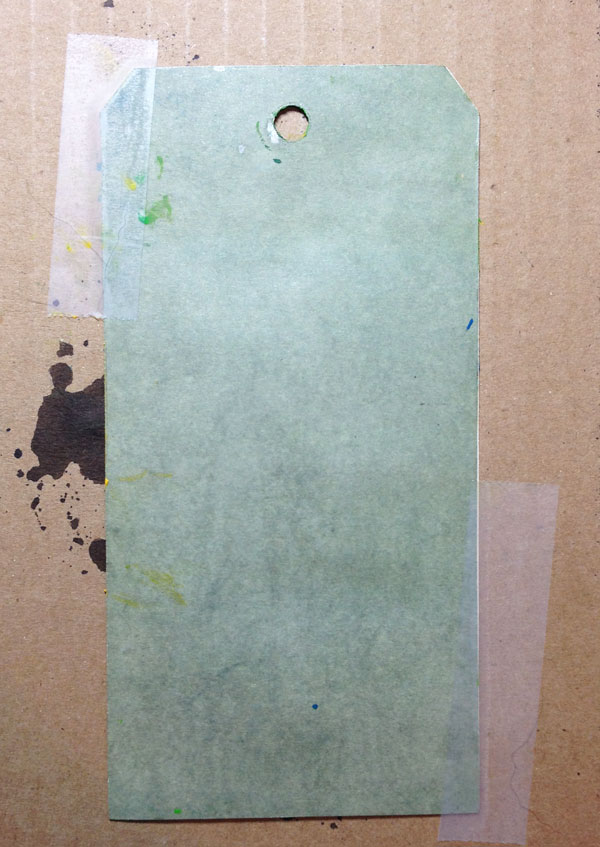
Here are the three tag layers. The distressed corrugated cardboard is on the left, untrimmed. The middle tag was first die cut from a plain manila folder using the Tag & Bookplates die. Then I used two dies from the Mixed Media die set
to create the open spaces in the manila tag. The third tag layer was also die cut using the Tag and Bookplate die but I used an Easter-themed sheet from Paper Stash Seasonal pad that I believe is retired. Just making do with what I have.
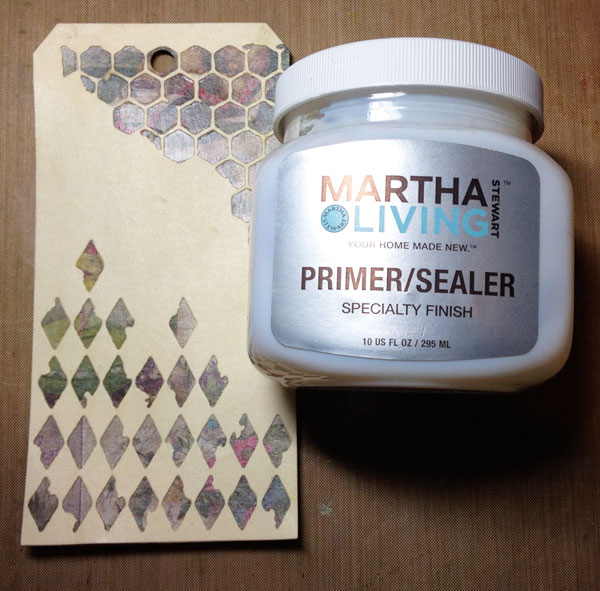
I glued the manila tag over the paper tag but the next step called for a layer of gesso which I didn’t have. The closest product I had was some primer/sealer. I used that and luckily it worked with the Distress Crayons.

Now the fun begins. I had fun rubbing and blending the bright colors. It was quite fun if not terrible on a new manicure again. I love the intense colors. As you can see, the primer/sealer worked well with the Distress Crayons.

I placed the corrugated layer over the colorful layer. I moved it around until I liked how the colors and patterns showed through the butterflies. I removed the corrugated layer and added adhesive to the back then I adhered it to the colorful layer. After it dried, I turned it over and hand-cut away the excess corrugated edges.

Tim’s original technique at this point was to add gold foil but I didn’t have any. Again, I decided to make do by adding some sparkle with gold embossing powder and texture paste. I used the Layering Stencil ~ Dot Fade and the Ranger Texture Paste
at the top and bottom of my tag. I applied Ranger Embossing Powder, Gold
and set it aside to dry. Then I realized that I would need to use a heat gun on the embossing powder and I didn’t know how the Distress Crayons would react.
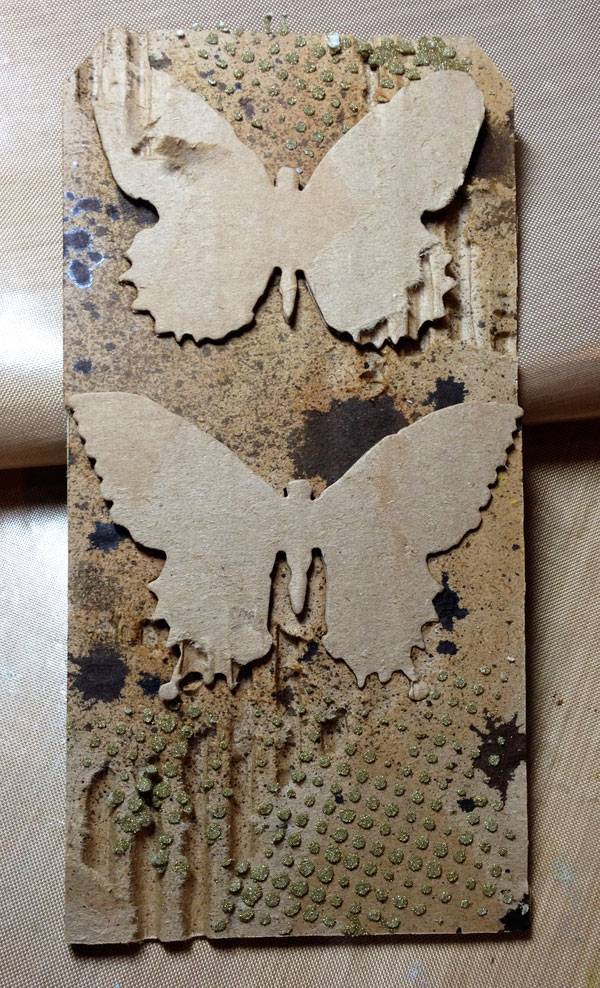
To solve this problem, I used the corrugated pieces that I had die cut out and replaced them into the openings to protect the Distress Crayons from the heat. It worked perfectly.
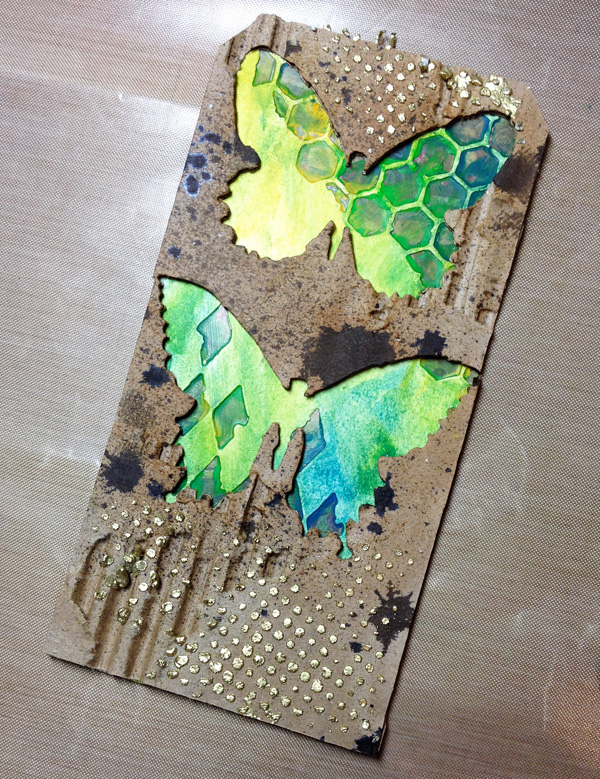
I liked how the gold sparkle added “life” to my tag and I had just finished using the Oly*Fun gold material so I stamped the word “Spring” on a piece and stapled it to the bottom of my tag.
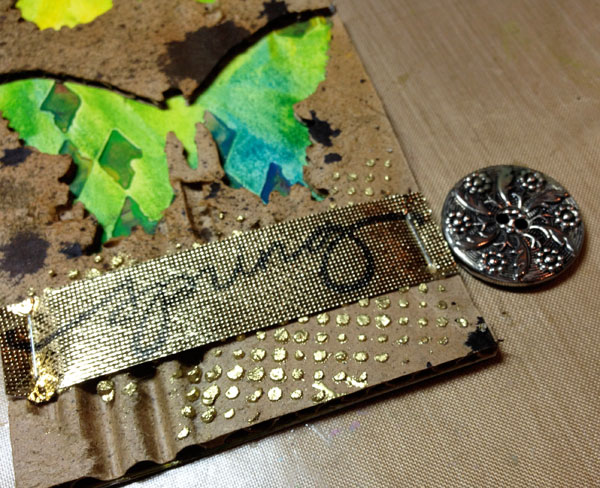
I also wanted to add some dimension so I found a vintage button with Spring flowers and leaves. Unfortunately it was in a silver-tone. I used Alcohol Ink, Butterscotch and an Ink Blending Tool and easily made it gold-toned for this project.

I like how everything turned out. My manicure is still a little inky around the edges but it is a sacrifice I am happy to make.

If you enjoyed this tutorial please follow my blog by clicking on the blue Follow button on the top right of my post or follow me on Facebook, Instagram or Twitter.
PRODUCT LINKS:
Sizzix Die with Texture Fades ~ Butterfly Duo

Ranger Distress Crayons – Set #1
Sizzix Tag & Bookplates die
Sizzix Mixed Media die set
Ranger Texture Paste
Ranger Embossing Powder, Gold
Ranger Alcohol Ink, Butterscotch
Ink Blending Tool


Thrilled to be Selected at TimHoltz.com

This is Linked to:
Create With Joy, Cupcakes and Crinoline, Denise Designed, DIY Showoff, Intelligent Domestications, Kathe With an E, Keeping it Simple, The Crafting Nook, The Crafty Blog Stalker, Tim Holtz and While He Was Napping


Leave a comment