
I made this Valentine Pocket Page book a few years ago and thought I would share it again in honor of Valentine’s Day. I had designed this Sizzix Pocket Page and Tag die and was so excited since it was one of my first die designs for the company. Now, years later, I still love this die and use it often.
 The fun thing about this die is that it creates two pages {front and back} plus a tag from a single sheet of two-sided 12″x12″ cardstock. The fold creates the pocket and you can use ring binders to hold the pages together. I also designed the holes to be able to fit two rings of a 3-ring binder. That means you can add these mini-pocket pages into a 3-ring binder for added embellishing.
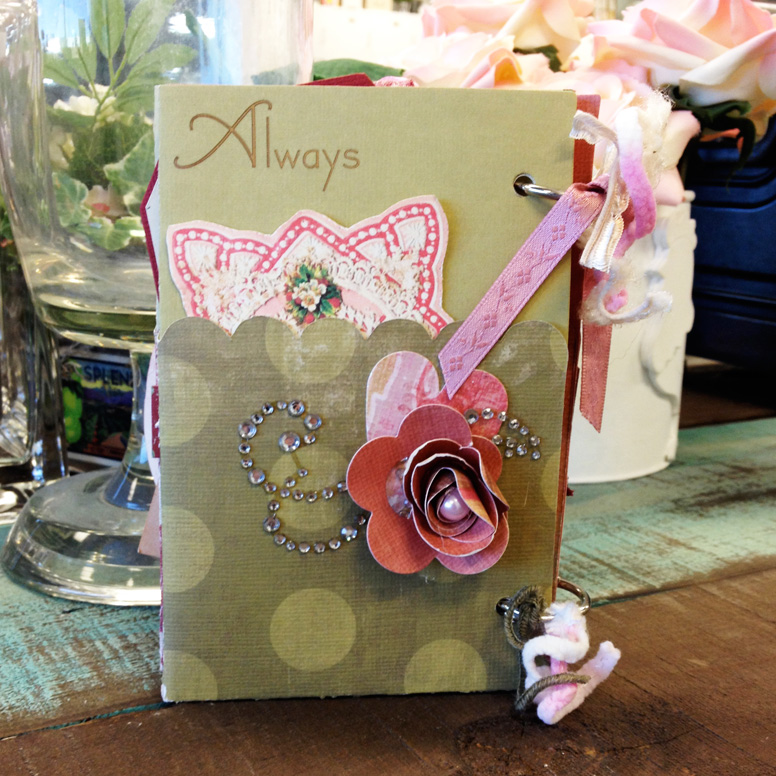
 Here are the first two pages. I used a rub-on for the word “Love”. On the right page I die cut a swirl using the Elegant Flourishes die and the flower using the Tattered Florals die. I also used a thrifted button for the center of the flower.
 On the left page I die cut the small butterfly using the Mini Butterfly die. I also used a Textured Impressions embossing folder on the tag. On the right page I used a circle piece that I believe is by Jenni Bowlin.
 I die cut a Paper Rosette on the left page and embellished it with ribbon and another thrifted button. The page on the right includes a real vintage key and a heart that I formed out of soft red craft wire.
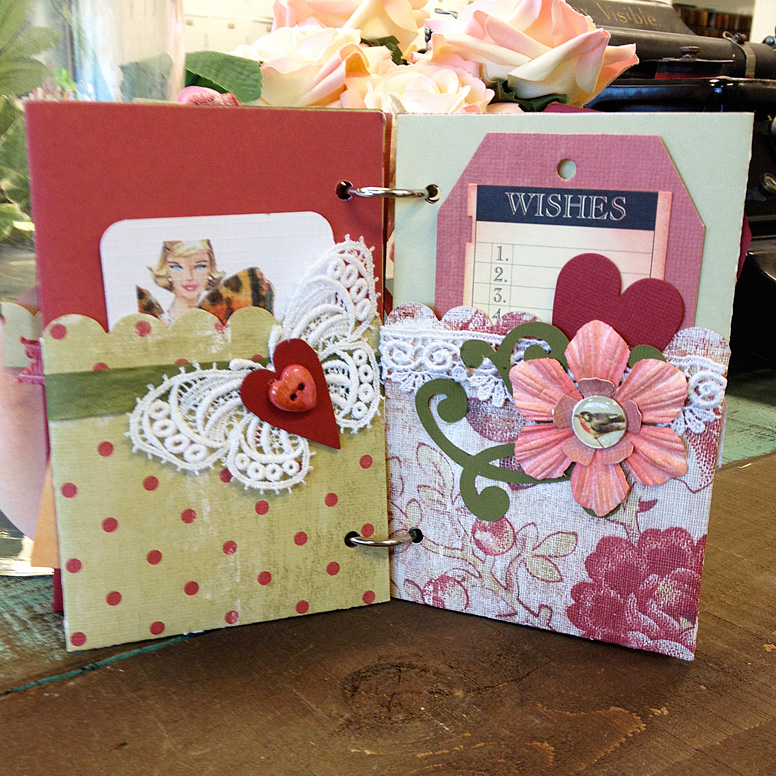 The left page is embellished with a piece of thrifted lace and button plus a die cut Mini Heart. The right page has more lace, swirls and flowers. I believe the “Wishes” card is by 7Gypsies.
 More lace, buttons and a vintage Bingo number 14.
 The back page has a Flower 3-D die cut. I added a little bling and ribbon on several pages as well.
Here is a quick visual to show how simple it is to create endless pocket pages using this die.
 Image 1 shows the prettiest side of the paper after it is die cut. The bottom third will be the front of the pocket so that will be embellished. Image 2 shows the reverse side. Since only the top part would show once the pocket is folded, I used some Distress ink to add color. Image 3 shows the pocket folded up. You can see the inked color at the top and the embellished pocket at the bottom. Image 4 shows the tags placed inside the pockets. When the page is folded and binder rings inserted, the tags are held in the pocket.
I hope you enjoyed this easy Valentine Pocket Page booklet. This is the same die that I used for my Craft and Hobby Association Trade Show Mini Album. It is so versatile and simple.
Happy Valentine’s Day!
Thrilled to be Featured at:
Create With Joy![]()
AFFILIATE PRODUCT LINKS:


This is Linked to: A Delightsome Life, Artsy Fartsy Mama, Craft Dictator, Crafts a la Mode, Create With Joy, Dear Creatives, Denise Designed, DIY Crush, DIY Showoff, Giggles Galore, Intelligent Domestications, Just Us Four, Katherine’s Corner, Keeping it Simple, Life on Lakeshore Drive, Organized 31, Scrapality, Summer Scraps, The 36th Avenue, The Answer is Chocolate, The Crafting Nook, The Girl Creative, Too Much Time on My Hands, USS Crafty and While He Was Napping


Leave a comment