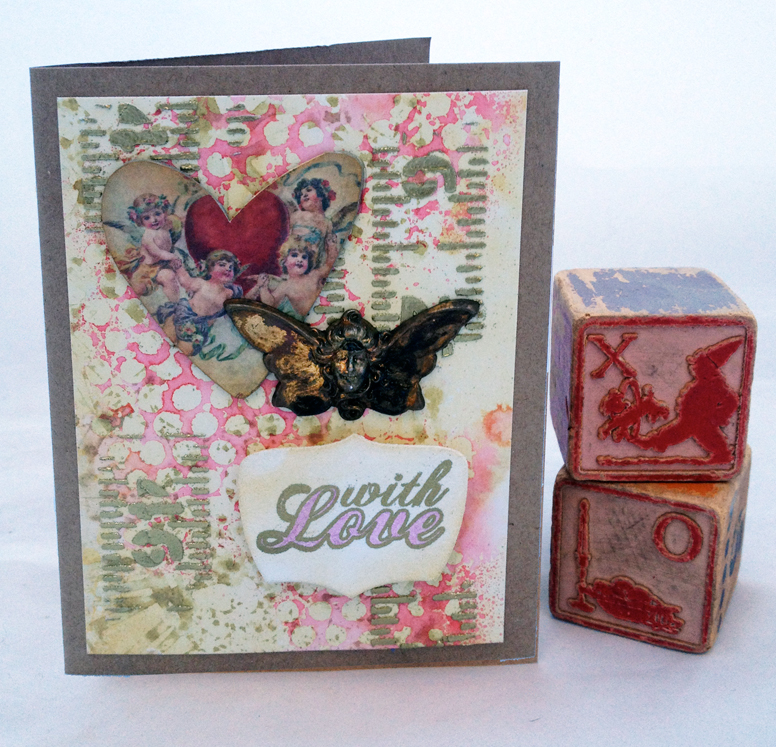
I am excited to be participating in the February 12 Tags of 2016 hosted by Tim Holtz. First let me begin by sharing my completed card {I made this instead of a tag} to give my Dear Handyman {Dear Boyfriend} for Valentine’s Day.
I love the way it turned out but I had a few crafting mishaps along the way that I thought I would share.
I first applied Antique Linen Distress Ink to my Craft Sheet, spritzed some water and pulled my watercolor paper across the surface. It was a good start but then I had some problems.
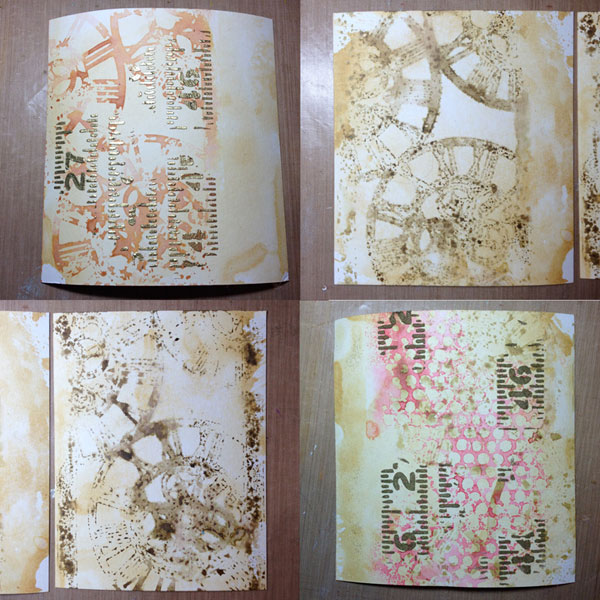
Here are just some of the experiments I had adding the second layer of Distress Ink. I inked directly on the back of the Clockwork stencil, spritzed water on the stencil and then laid it on top of the paper. When Tim did this he had a beautiful transfer of the image. As you can see from my first three examples, it wasn’t so pretty. The first one was too dark although the ink transferred well. I then used a more neutral color and got dark splotches that looked like coffee grounds. In the third attempt, I had the dark splotches but then I experimented with the idea of first wetting the paper then inking the stencil and laying it on top. It just kept getting worse. Finally in the fourth example you can see a blotchy background behind the pink pattern. Luckily I got a really nice transfer using a different stencil and Festive Berries Distress ink. I thought I would share these mishaps because sometimes art doesn’t go as planned.
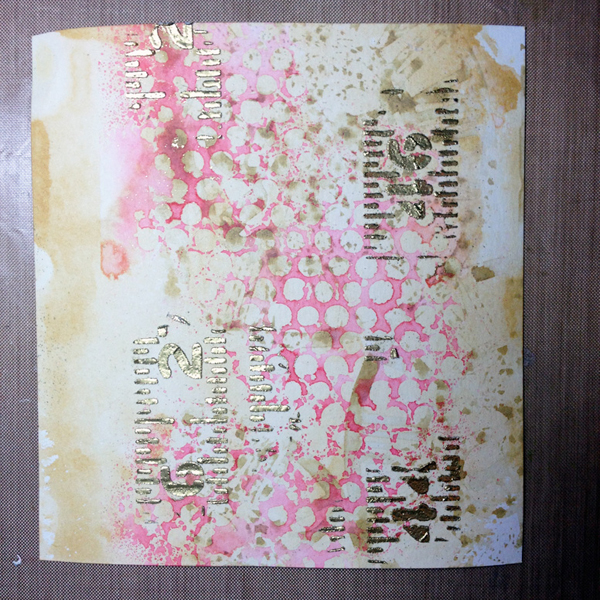
This is the final background that I liked. True Craft Confession; I’ve never used embossing powder before. I think I’ve never tried it because there are just so many colors and I was overwhelmed on which to buy. My enlightened moment came while watching Tim do a demonstration at the Carson Rubber Stamp Convention last year. He used Texture Paste and gold embossing powder and I was enchanted.
The next step was to add the pink stenciled pattern. I used the Bubble stencil and applied dots to the surface but it looked too busy. I happened to spray water on the stencil to clean it and noticed that it had a lot of ink on it. I laid that down on another background and that is how I accidentally got the nice pink pattern that you see above.
Since it is a Valentine’s card, I had to include a heart. I went through my old stash and found a heart on the Idea-ology Seasonal Plain Grungeboard set {discontinued}. I used a sheet from the Paper Stash Seasonal and glued some cherubs on the heart. I cut that out and used Tea Dyed Distress Ink on the edges.
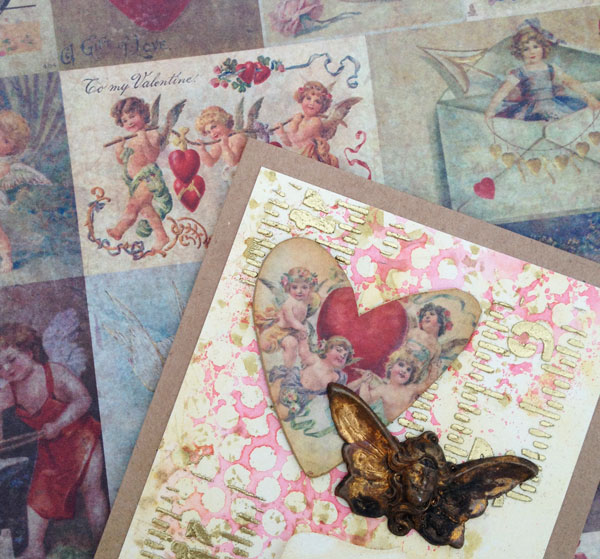
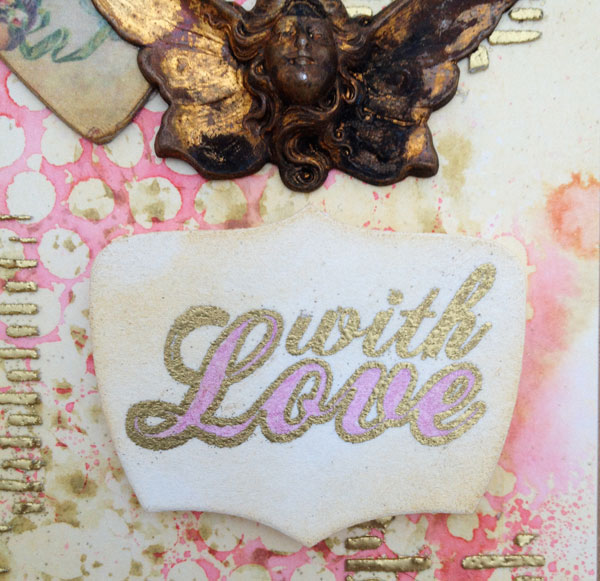
I used my Birds and Phrases clear stamps for the sentiment. I used Versamark Watermark ink to stamp the words “With Love” on a piece of Paper Leather then applied gold embossing powder. Another Craft Confession; I just bought my first Copic markers and this is the first time I’m using it. During my college years, I used a lot of Pantone art markers for marker rendering classes and then never used them again. I didn’t think I needed more markers. But I used a Copic marker for the first time with Eileen Hull and they were so pretty that I just had to get some. I used a pink marker to color the word “Love”.
I layered everything together on the background but I realized that it needed something metallic and dimensional.
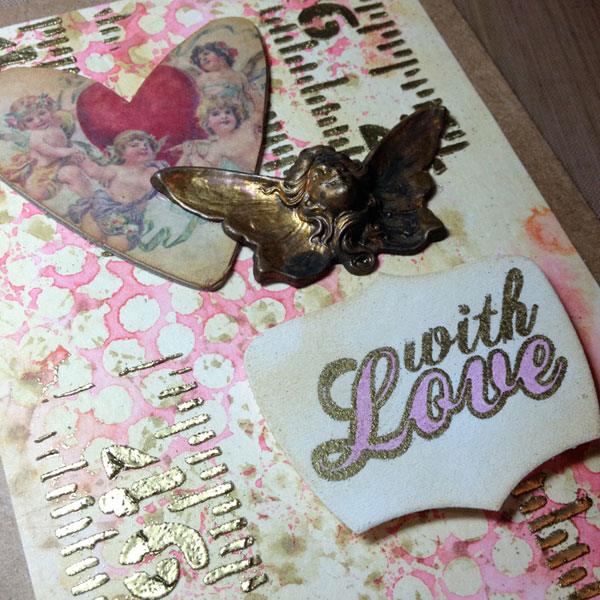
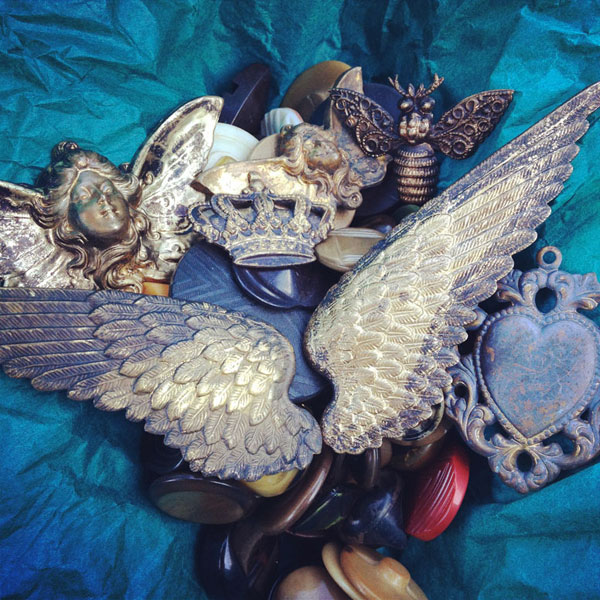
So the final touch was to add the winged angel. I had bought a handful of charms at Junk Bonanza in San Diego last year. I had been saving them for a perfect project and this was it. Here is a photo of charms and some vintage buttons from that shopping trip.
So sometimes projects don’t seem to go as planned but it really doesn’t matter if you like how it turns out in the end. I can’t wait to give Dear Handyman his card on Valentine’s Day.
If you enjoyed this tutorial please follow my blog by clicking on the blue Follow button on the top right of my post.
RODUCT LINKS:
Distress Ink, Antique Linen


Stampers Anonymous Layered Stencil, Clockwork

Stampers Anonymous Layered Stencil, Bubble

Ranger 15-Inch-by-18-Inch Inkssentials Craft Sheet


Sizzix Birds & Phrases Clear Stamps


Copic Markers RV04-Sketch, Shock Pink

This is Linked to: Adventures of Mel, Chic on a Shoestring, Cozy Little House, Create With Joy, Cupcakes and Crinoline, Dear Creatives, Denise Designed, DIY Crush, DIY Showoff, Flamingo Toes, Funky Polka Dot Giraffe, Giggles Galore, GingerSnap Crafts, Homework, Intelligent Domestications, Just Us Four, Kathe with an E, Keeping it Simple, Ladybug Blessings, Lamberts Lately, Life on Lakeshore Drive, Live Laugh Rowe, Live Randomly Simple, LouLou Girls, Mad in Crafts, Mom Home Guide, My Uncommon Slice of Suburbia, Pieced Pastimes, Sew Can Do, Tatertots and Jello, The Crafting Nook, The Crafty Blog Stalker, The DIY Dreamer, The Girl Creative, The Happy Housie, The Life of Jennifer Dawn, The Melrose Family, Tim Holtz, USS Crafty and While He Was Napping


Leave a comment